

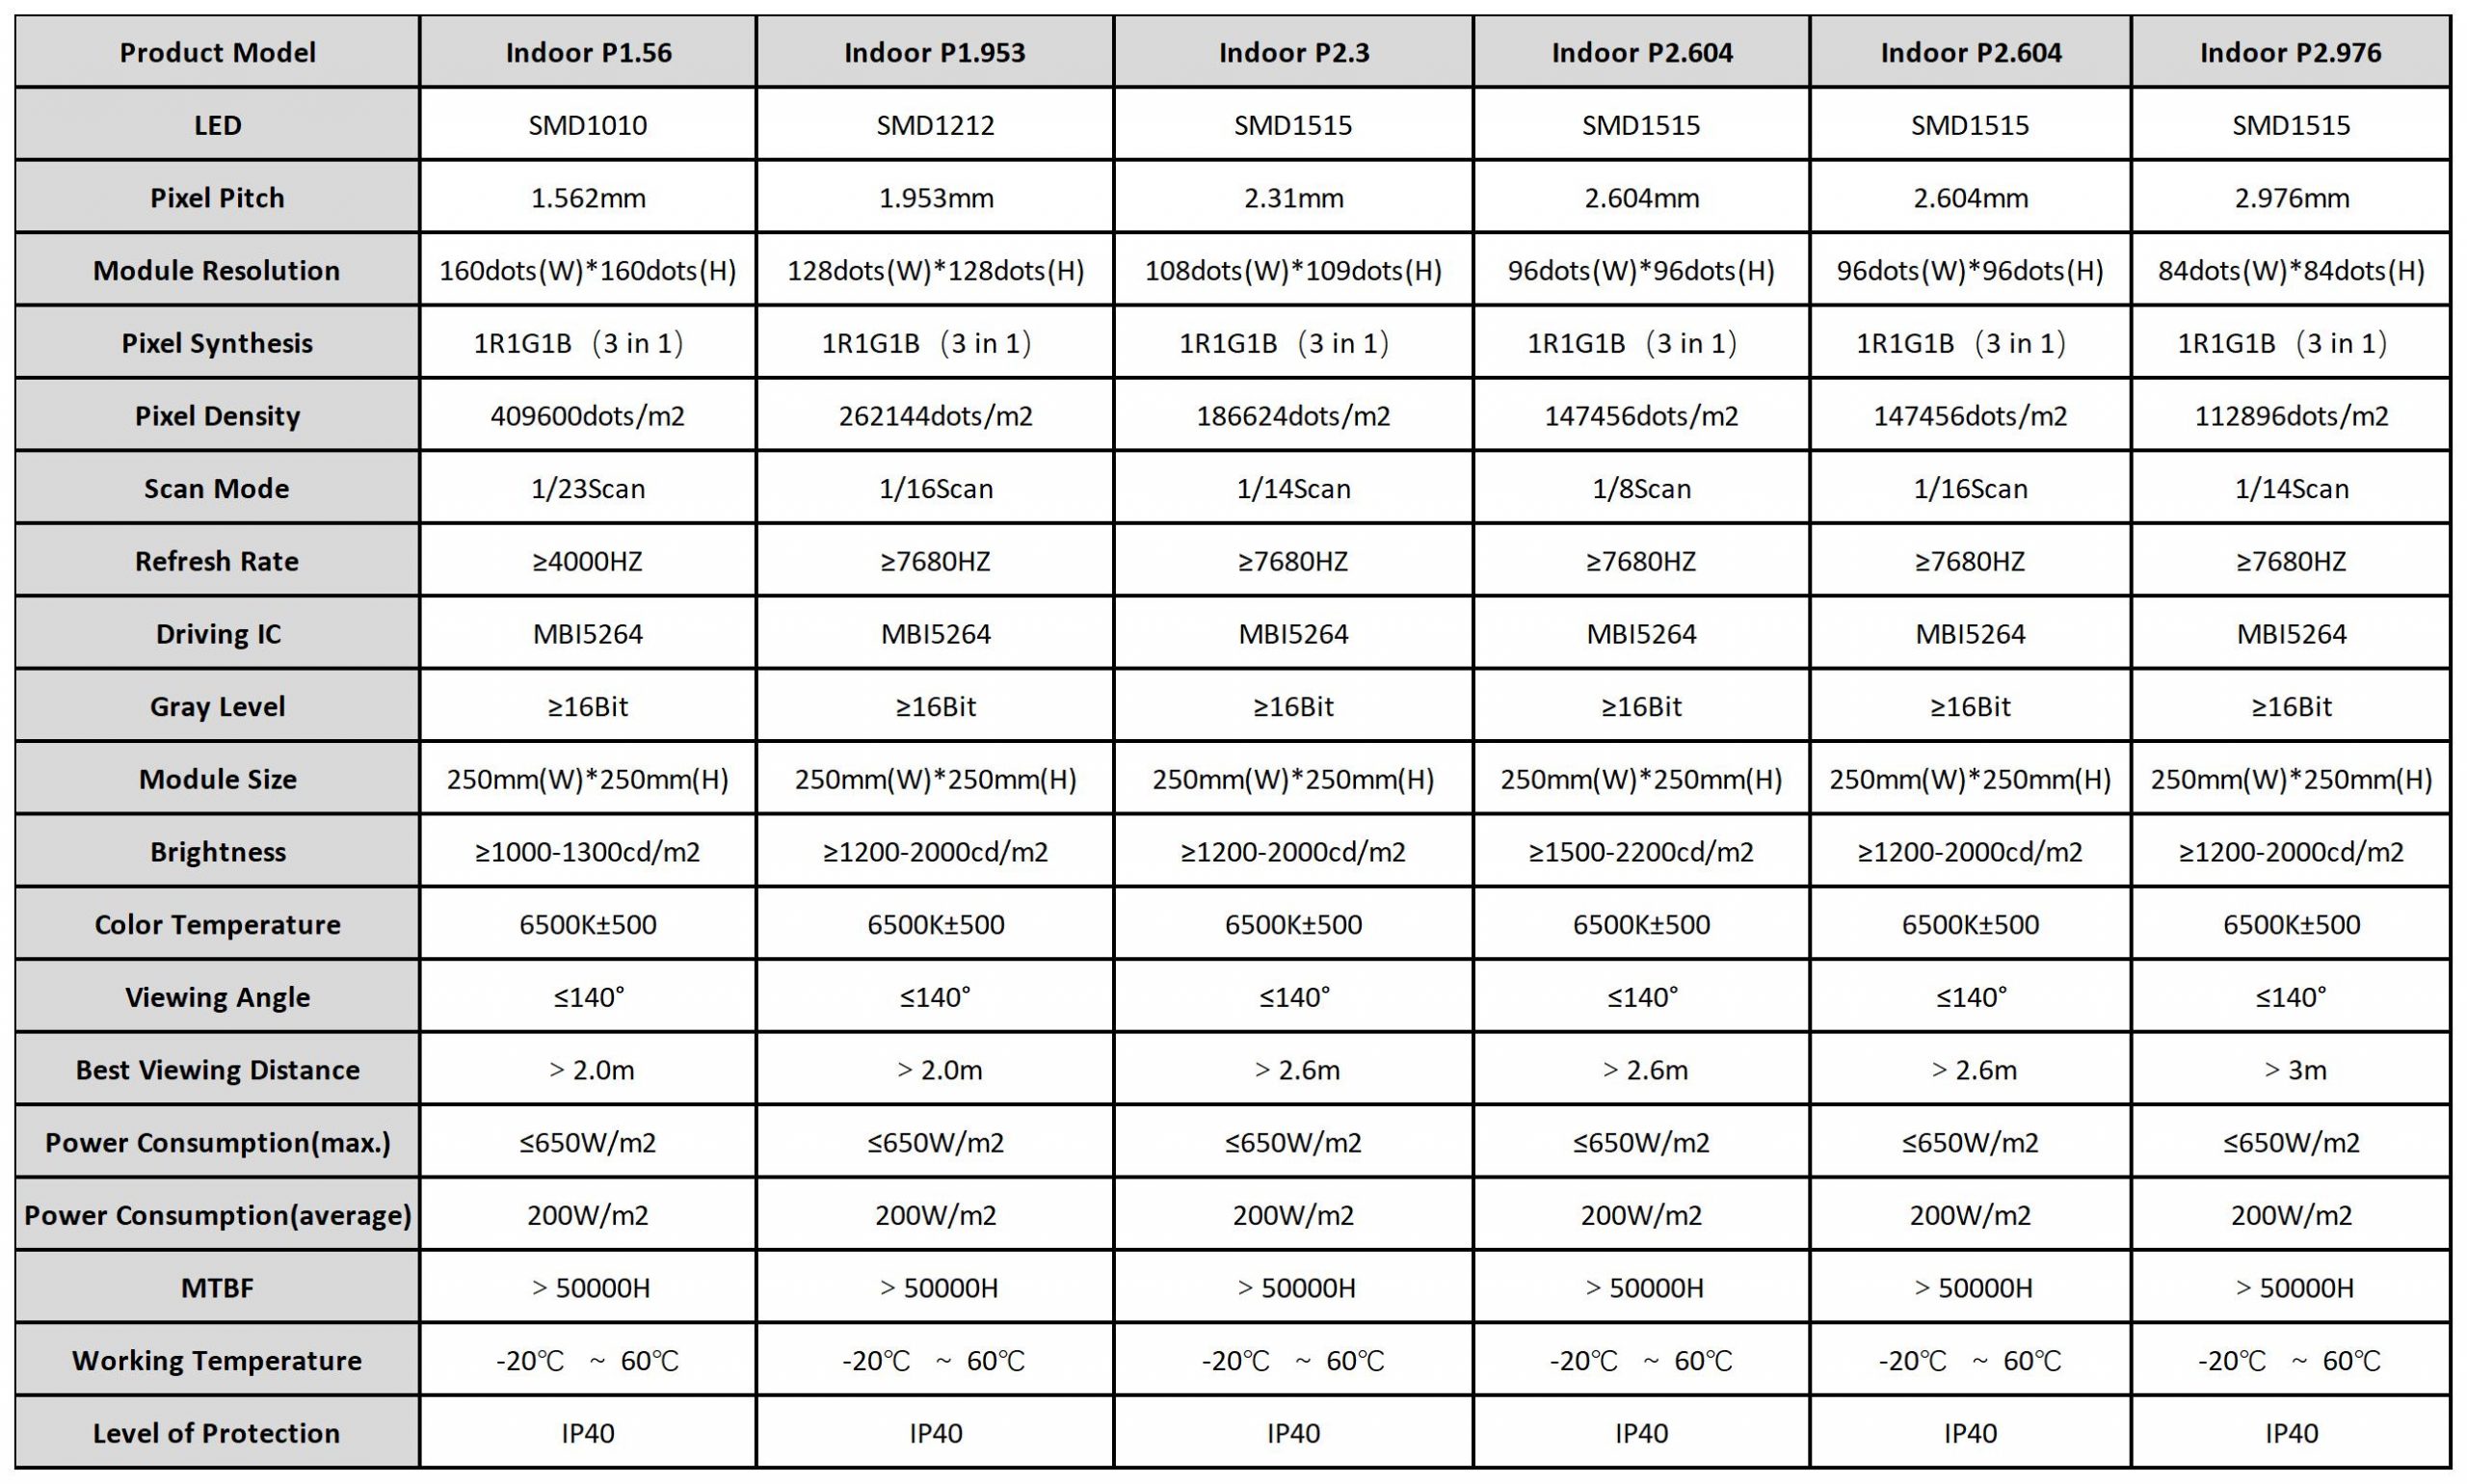
Virtual movie shooting LED panel Parameter:
MAXTOP‘s Virtual movie shooting LED panel:
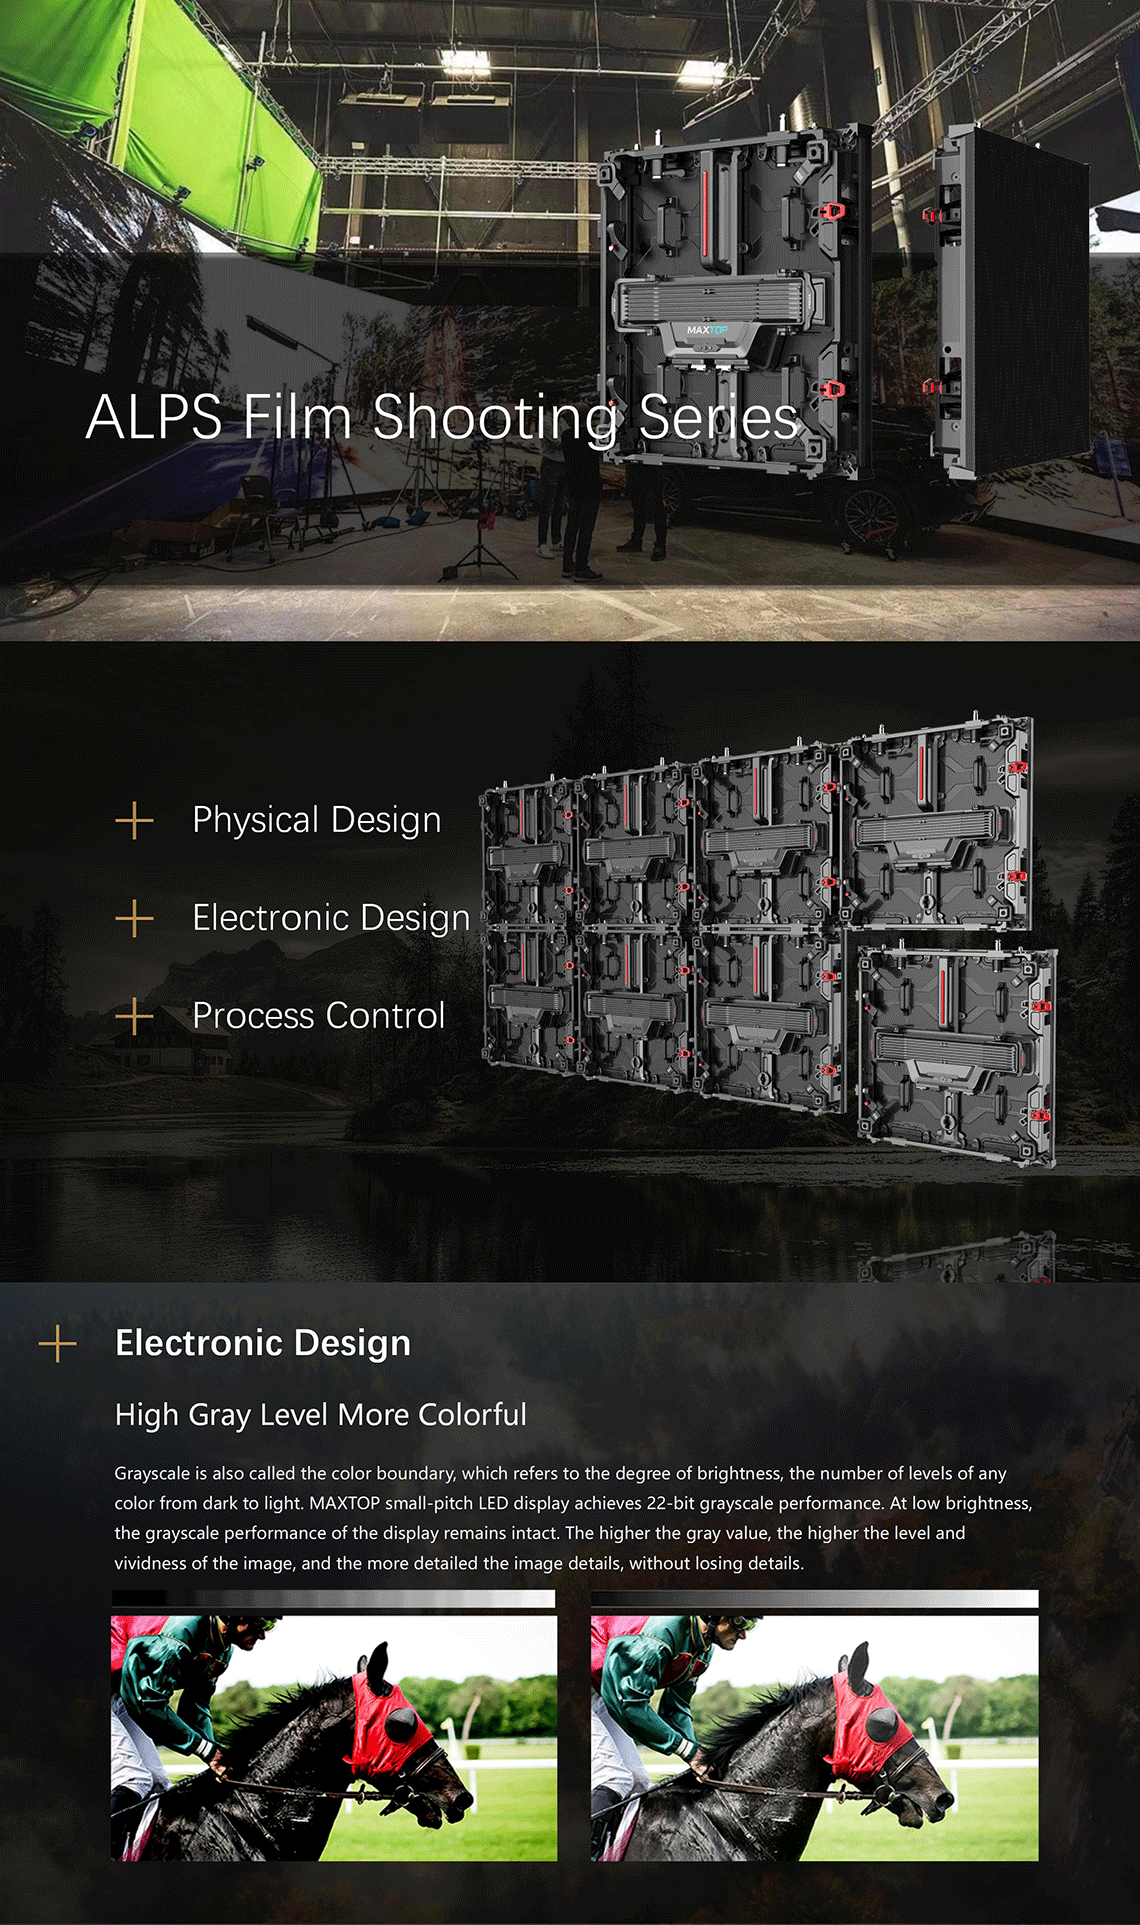
- Physical design
- Electronic design
- Process control
- High gray level more colorful
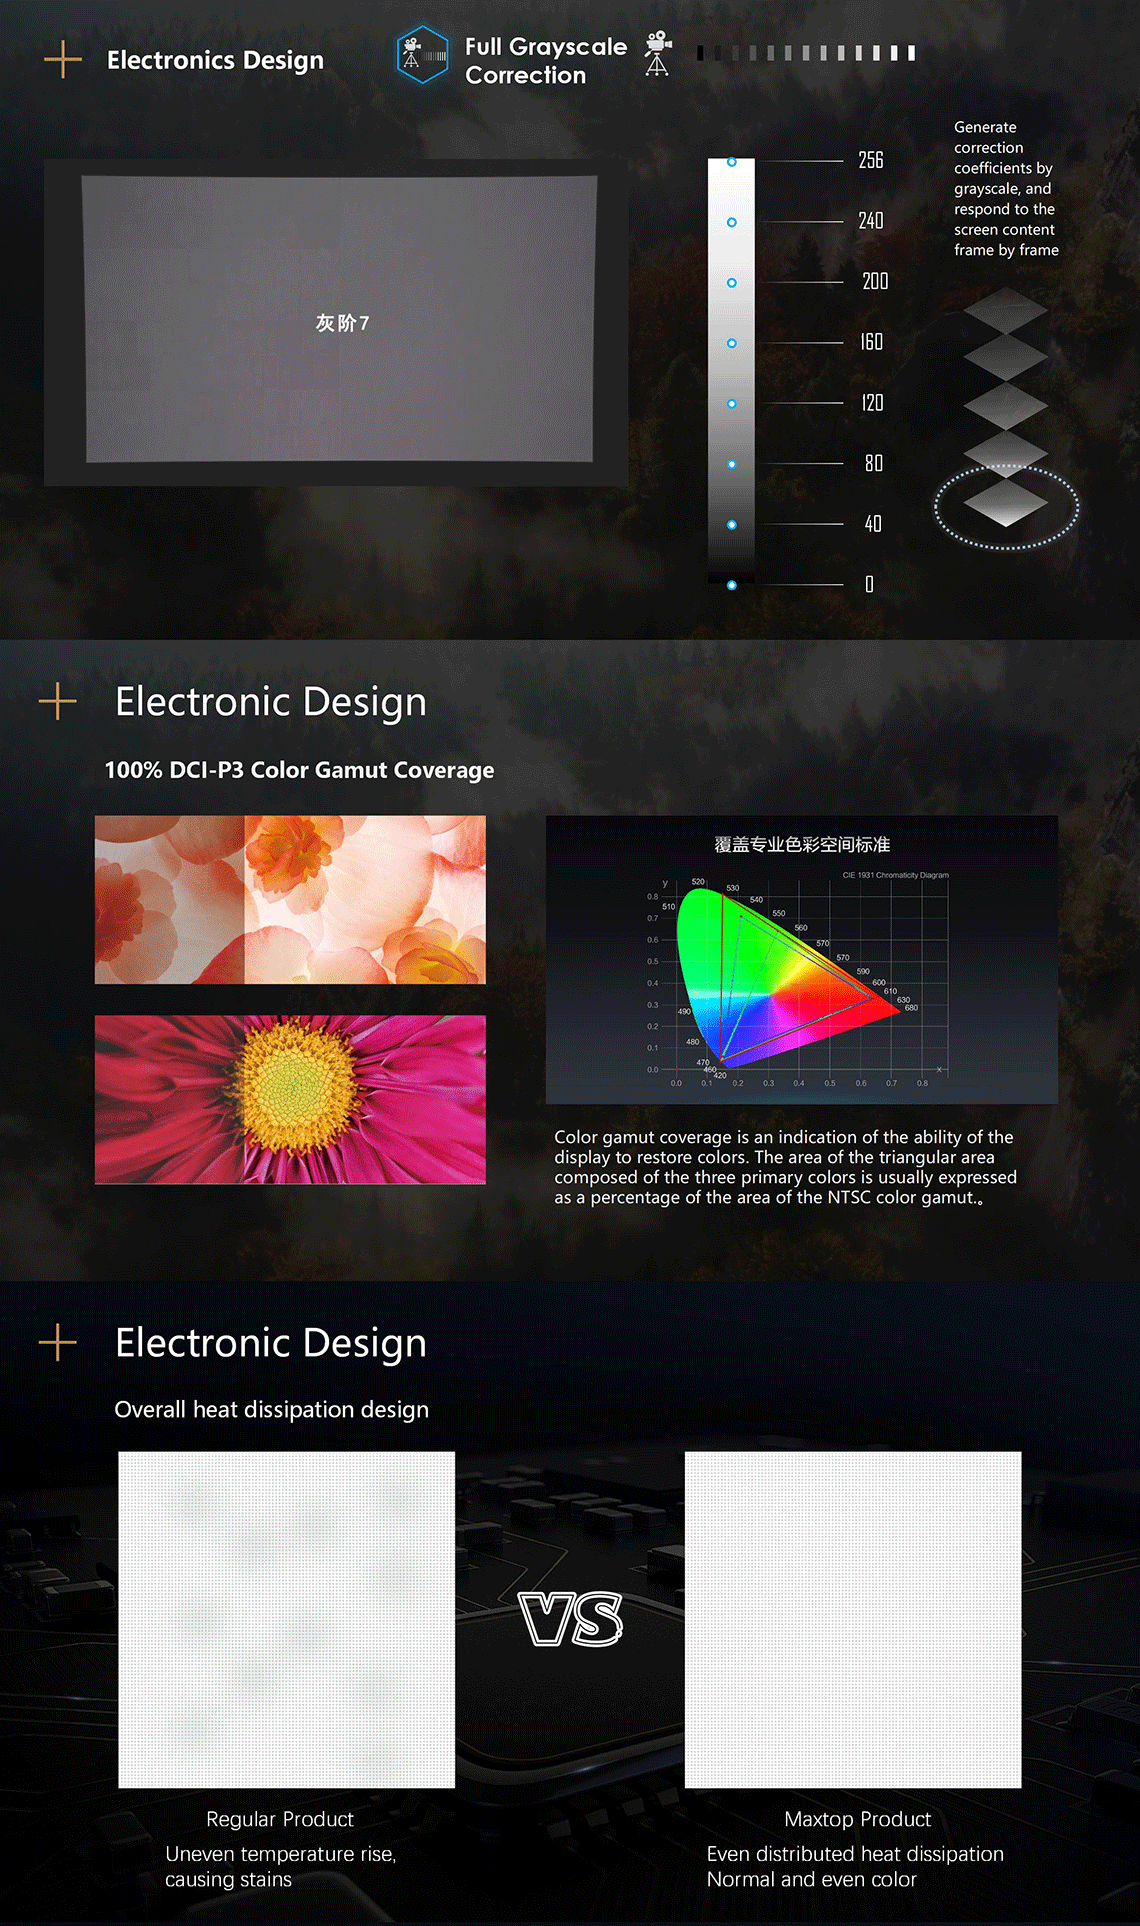
- Generate correction coefficients by grayscale, and respond to the screen content frame by frame.
- Even distributed heat dissipation.
- Dynamic algorithm of the real-time image analysis.
For more rental displays, please visit our rental solutions.
Also, you can kindly visit our latest LED news on Facebook.
How to test the LED panel
First, install the first row and use a level to measure whether the cabinets in the first row are vertical and horizontal. Gently adjust with a leather hammer. If there is a height error, it is recommended not to slam the top of the cabinet. We often use thin iron sheets to raise the bottom. Because the cabinet is a standard cabinet. If the size is changed forcibly, the subsequent accumulated error will become larger.
Second, start to install the second row of cabinets. Take the box and place it in the middle of the second row. The installation method is the same as that of the first layer. Use a leather hammer to adjust the horizontal and vertical screws and do not tighten them. If you encounter a gap, you can use the flatness adjustment screw to fine-tune the screw at each position of the gap.
Third, use the same method to install the second row. Adjust the horizontal and vertical, and tighten the connecting piece with the lower row with screws.
Fourth, install the remaining boxes in the same way. Then plug in the power cord/signal cord between the display units.
Finally, install the module to the cabinet and then power it on for debugging to proceed to the next step.